Wednesday, April 20, 2011

Completion: Mission Possible (P1)

(new format for titles, woo)

Anyways, here we are. Albeit it a bit late, I believe a completion post is required for our most labor intensive project: our Mission Possible device for Science Olympiad.

Quite literally, it is the most over-engineered, hand built, scientific, unreliable... 90 second timer.

Does a 90 second timer deserve all of those descriptors? You can decide that for yourself one you see the actual thing.

First, some information:

Time spent: ~168 hours
Cost: ~$150
Primary material: wood
Secondary material(s): LEGO, simple electronics, electric motors, screws, WIN
Primary purpose: Autonomously complete a sequence of tasks in a specific amount of time.

Design objectives:
Win Science Olympiad competition - FAIL
- Regional Competition - 3rd place
- State Competition - 12th place
Provide design and engineering education - WIN
Incorporate hand built mechanisms - WIN
Score the highest amount of points possible - WIN
- all highest point tasks completed
- longest time for sand timer running
- block stacking device win
- customized features (custom built fan, bottle, motor system)
Impress the Judges - WIN

Personally, I have to say I'm disappointed that we didn't get anything for our efforts, but in the end, I know that, with the amount of hard work we put into building this thing, we won that competition (we could have).

To follow in part 2: build pictures, maybe video links, task descriptions

Friday, March 18, 2011

[UPDATEUPDATEUPDATEUPDATE]

HEY YOU.

We've been working on several thousand projects. loljk. But we have done a lot of things.

So, I wanted to share about recent things that we have acomplished.

Here's a list of a few things we've done in between then and now.

- Science Olympiad (Two building things: Mission Possible and Wind Power)

Actually, before I continue, this brings up the topic of Mission Possible.


It was probably the most challenging/difficult/complex build that was completed from scratch.

We designed it. Built it. Tested it. And got 3rd place.

[oh yeah. blogging from the floor of my garage.]

But that has kept us pretty much preoccupied until now.

So there's not really much else going on because of SO and school.

Just a quick update.

Oh, we're planning on releasing the time lapses from our build sessions very soon. Like tomorrow. Now proclaimed as "Intersphere day", the 3rd Saturday of March.

So happy Intersphere eve!

Wednesday, August 25, 2010

Just an update on...

...nothing really.

Unfortunately, school has begun, which means less time for projects. And we're pretty busy.

So, I, for sure, will not be updating for a while. I'm not quite sure about Joey.

Sure, the projects are still on our minds, but we still have things to do.

Well, maybe on a rare free weekend or week off we might do something, but may not update.

So I will talk to you...later.

Monday, August 9, 2010

Lasertag project update

Hey look an update.

[I'm a bit at a loss as to what to do considering we already have many projects in progress but this is the start of the blog ... I was thinking that any previous updates will end up on the site, or on their own page, but that doesn't really make sense (mostly because I'm trying to fully transition over to the blog).]

I guess a recap will have to do.

  • Stage 0 was working up the initial idea to make the lasertag project
  • Stage 1 was mainly a proof of concept by me to see if we could get a 30kHz receiver working with a 555 and IR LED
  • Stage 2 was...something. Probably adding in the monostable pulse circuit.
  • Stage 3 was for range testing, I guess. We set up the receiver and transmitter on different breadboards.
  • Stage 4 was testing with a LED bar graph and counter
  • Stage 4.5 was testing with a 7-segment LED display instead of the bar graph
Currently, we're on Stage 4.5.

On the transmitter side, we have a LM556, with one half generating a short pulse when triggered, and the other half modulating the pulse to ~30kHz.

On the receiver side, we had the 30kHz detector, with its output leading to the "Down" input on a "74192 up/down decade counter" IC. The counter's BCD outputs connected to a "4511 BCD to 7-segment display decoder" IC. (alternatively, you can use a 7447 decoder IC if you use a common anode LED display versus a common cathode display)

We had some weird fading between numbers going on, probably because of electrical noise. We hope to eliminate that by using ICs with higher noise immunity. Something else we hope to add is another 555 timer circuit, connected to the "Up" input on the counter; we have yet to find a way to stop the separate 555 when the count has reached its maximum.


Sunday, August 8, 2010

Site Update 2

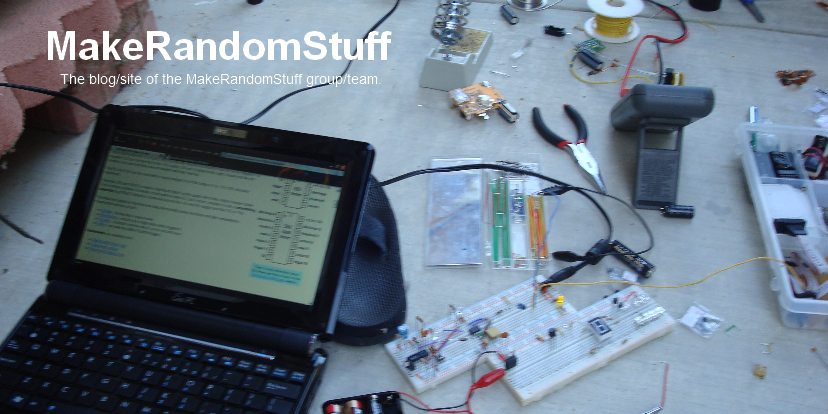
Added banner image and edited header text. Changed NavBar to "Transparent Dark".

Don't you like the beautiful picture? It's from one of our many work-days; in this instance we were working on the ground because of the lack of an extension cord for the soldering iron. The top half is me (Joey) soldering some flash capacitors and the bottom shows Adam working on the lasertag project. The netbook you see is on this page.

Things to do:
  • Set up Picasa account for images
  • Actually get some info and projects on here

Saturday, August 7, 2010